How to Add and Configure Internet Plans in Noch Wired
How to Add and Configure Internet Plans in Noch Wired
In this guide, you’ll learn how to create and configure internet plans that automatically control speed, data limits, and billing cycles on your Noch Wired whether you’re running a hotspot or a PPPoE-based network.
Contributor By:
Enock Wafula
27 Sep,2025, 17:30
Introduction
In an ISP billing system, every customer’s service is defined by a set of plan attributes—speed tiers, data caps, contract terms, and pricing structures. Managing these plans manually is error‑prone, time‑consuming, and difficult to keep consistent across a rapidly changing product portfolio. A single misconfigured bandwidth limit or a forgotten discount can lead to billing disputes, revenue leakage, and a degraded customer experience.
Benefits of automating plan configuration
| WHAT YOU GAIN | wHY IT MATTERS |
|---|---|
| Easier customer onboarding | New plans and price adjustments roll out instantly, reducing the lag between product launch and revenue capture. |
| Zero human error | Rules and validation logic enforce consistency, eliminating miss‑priced bundles or duplicate features. |
| Real‑time analytics | Automated data sync supports up‑to‑date dashboards, enabling proactive margin optimization |
| Customer satisfaction | Faster, accurate billing reduces disputes and improves trust in the service. |
In short, automated plan configuration turns a manual, fragile process into a robust, agile engine that powers reliable billing, higher revenues, and happier customers.
In this guide, you’ll learn how to create and configure internet plans that automatically control speed, data limits, and billing cycles on the Noch Wired Billing System, whether you’re running a hotspot or a PPPoE-based network.
Prerequisites:
What’s needed before starting:
- Access to Noch Wired Dashboard. Click here to access the Noch Wired Dashboard.
- Defined pricing strategy and speed tiers
Plans and pricing definition
Plan
In Noch Wired, a plan can be considered a named group of account features for a specific price in a specific period.
Pricing
Pricing defines a single period of time that can be billed, and an account can be extended for this period. For example, 1 day.
Step 1: Plan Your Internet Packages
When creating internet plans, start by giving each plan a clear, memorable name that hints at its value—think “Starter,” “Pro,” or “Elite.” Combine the name with a brief description of the plan features: define the upload/download speeds and data caps (or unlimited). Using distinct, descriptive names lets customers instantly grasp the differences, reduces confusion, and makes marketing easier, while well‑chosen features ensure each package truly meets a specific need and delivers real value.
We will be creating the following plan:
| Plan Name | Short description | Allowed Services | Plan features/ Limits | Pricing Options |
| Hotspot Value | Unlimited 5 mbps | Hotspot |
|
|
Step 2: Add the Internet Plans in Noch Wired
Log in to Noch Wired Dashboard and navigate to the plans page.
Follow the following steps to navigate to the plans page manually.
- Click on the Billing and Plans menu item on the left of your screen.
- Click on the plans submenu. If your organization is new, you will see that 2 plans have been created.
- Click the "Add plan" button located in the top right corner of your screen.
%20(1).png)
A pop-up dialogue will appear with a form that contains the Plan Basic details.
Plan Details
This defines the name and a short description of a plan you are creating. It contains the following fields.
- Name— Plan name that is visible in headers, invoices, Noch Wired Hotspot pages, etc. This should be a short name like “Basic,” “Premium,” or “Pro.”
- Description—Stores a short description for the plan that will be used to provide more information for marketing purposes, e.g., “Enjoy unlimited 5 Mbps,” “Best value for home users,” etc.
- is visible to clients - Shows whether the following will be available for purchase in Noch Wired Wifi login pages.
- Is Plan Default - New users will be assigned this plan. You can change this later.
Fill in the details of the plan we are creating according to the information that was defined earlier. Click on the "Go to plan limits" button to save the plan information.
%20(1).png)
After saving the plan, the next dialogue shows the place to define and configure the various plan limits and features.
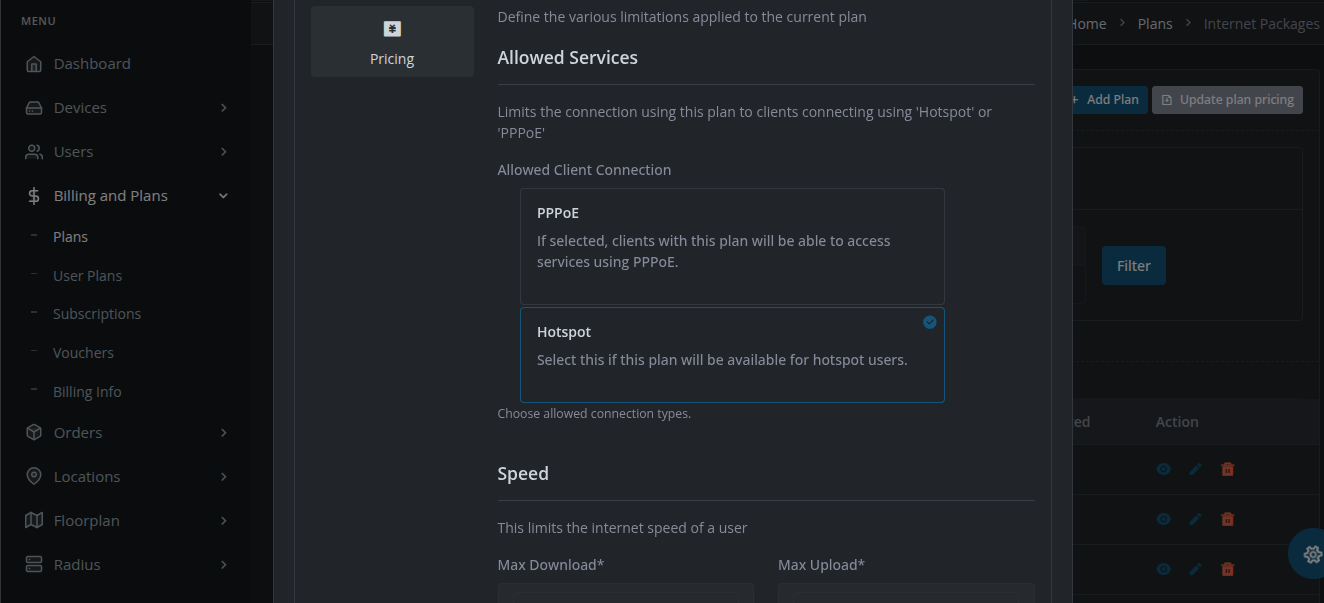
Plan Limits
An account that uses a given plan can have various restrictions. Each plan can have multiple defined sets of features that can be defined, for example, the bandwidth will limit the internet speed of a user.
The following limits can be defined for any plan:
- Allowed Services: Defines the ways allowed for a customer to connect and access the internet. It has 2 options: Hotspot and PPPoE. If hotspot service is allowed, clients connecting using the Noch Wired Wifi Hotspot will be allowed to access the internet using this plan.
- Speed/Bandwidth: Limits the upload and download speed of the internet for users connecting using this plan.
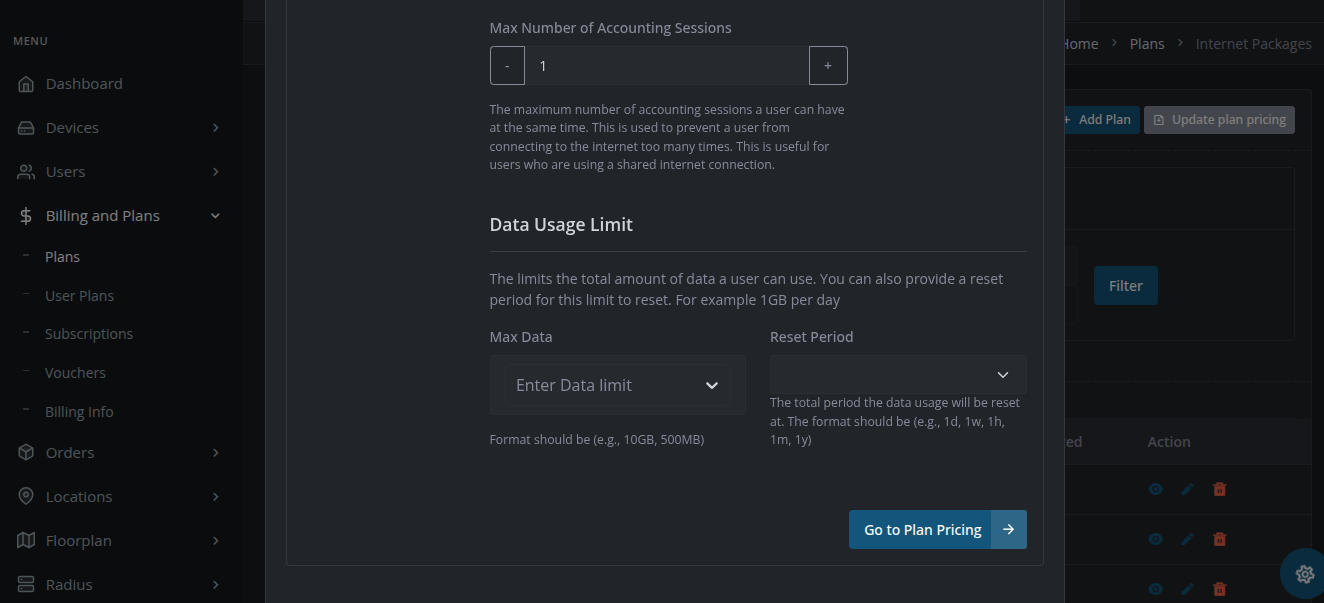
- Number of Devices: Defines the maximum number of device connections a user is allowed to use their account at the same time.
- Data Usage Limit: This limits the total amount of data a user can use. You can also provide a reset period for this limit to reset. For example, 1 GB per day
Fill in the plan limits according to the initial plan details
Select the internet speed that will be applied to the current plan

Click on the "Go to Plan Pricing" button to save the plan limits
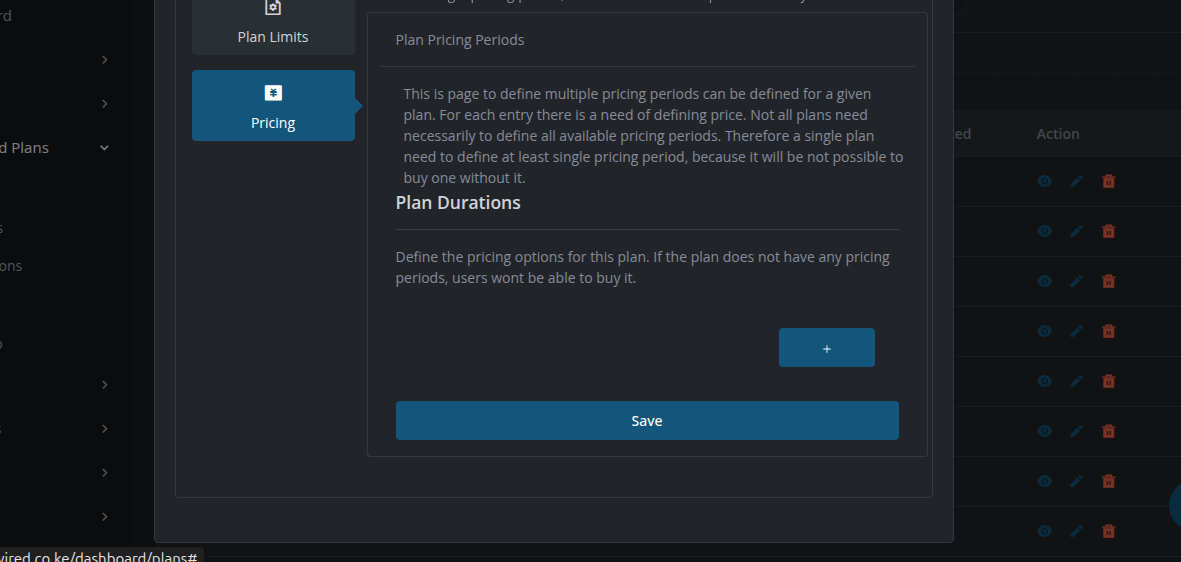
Plan Pricing
Pricing defines a single period of time that can be billed, and an account can be extended for this period. A single plan can have more than one pricing period. In our example, our "Hotspot Value" plan can allow users to purchase it for 1 hour, 3 hours, or 1 day.
Click on the "+" button to define a plan pricing option.
Choose a period value from the dropdown, e.g., 1 hour, and provide the price for this plan duration. You can keep adding more plan pricing options that users can buy, for example, "3 hours" for KSH 15.
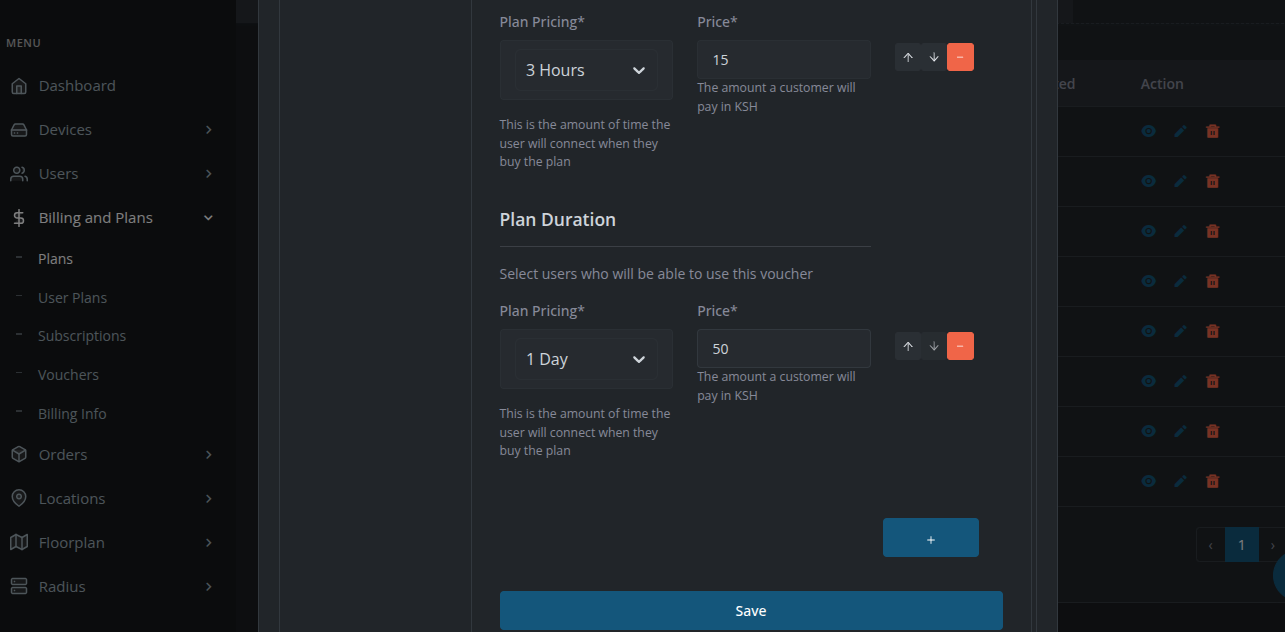
Click on the "Save button" to save the plan pricing options.
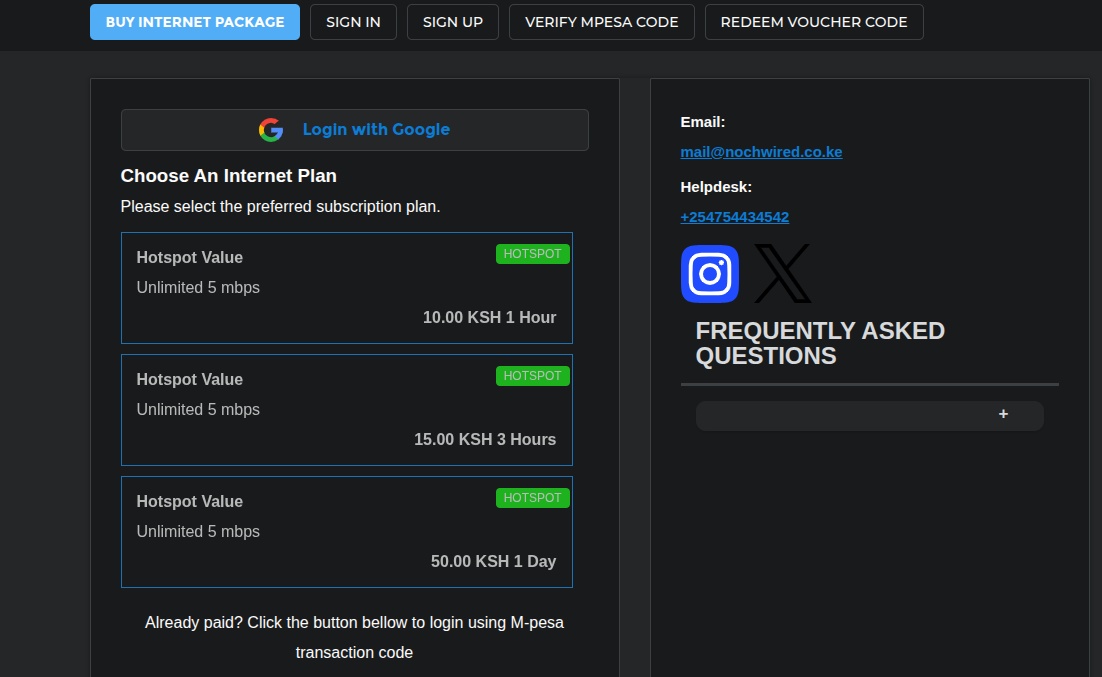
Your plan is now completed, and users can purchase and use the plan. The image below shows how the plan we just created will appear to hotspot users on Noch Wired Wifi login pages. Click on the link below to view your organization's buy plan page.

Conclusion
In this article, we created an internet plan that can be used for hotspot users with a limit of one device per user account. We also added several plan pricing options that users can purchase using M-Pesa.
If you have any questions or need further assistance, feel free to reach out!
Additional Resources
- How to Configure MikroTik Router: Initial Hotspot configuration for Noch Wired
How to add MikroTik to Noch Wired
Popular Posts