How to Configure MikroTik Router: Initial Hotspot configuration for Noch Wired
How to Configure MikroTik Router: Initial Hotspot configuration for Noch Wired
In this article, I will take you through the first-time configuration of your newly registered router to work with Noch Wired billing. We will configure a hotspot on the MikroTik device and configure interfaces that will be added to the hotspot. By the end of the article, you will have a working captive portal running on your MikroTik router and managed by Noch Wired.

Contributor By:
Enock Simiyu
10 Jun,2025, 20:20
Prerequisites
Before you begin, ensure you have the following:
- A MikroTik router running RouterOS (tested on v6 and above)
- Access to Noch Wired Dashboard. Click here to access Noch Wired Dashboard.
- A working internet connection on the MikroTik device
- You have registered your MikroTik device successfully with Noch Wired. Click here to register a new device.
Step 1: Choose the configuration templates to apply to your device.
What is a template?
Templates are designed to store configuration that can be reused by some or all the devices in the system.
Updating the configuration stored in a template allows you to update the configuration of all the devices that have that template assigned.
This means that the configuration can be defined only once for multiple devices. If the need to update a specific piece of configuration arises, it can be easily achieved by updating the template.
Accessing the registered Mikrotik Device
Noch Wired has several predefined templates that you can apply to your device. Click on the devices page on Noch Wired Dashboard.
Click on the devices menu on the right of Noch Wired Dashboard
Click on the devices submenu.
Click on the "Edit icon" of the device you are going to configure.
The MikroTik device we are going to configure should show up on this page.
%20(1).png)
Follow the steps in the image to access the devices page
A pop-up showing the current device details will appear. On this page, you can edit the default device details, such as the device name.
On the pop-up, click on the "Device settings" button to view the current device configuration settings.
%20(1).png)
On this page, you will see some of the default configuration templates that have been applied to your device.

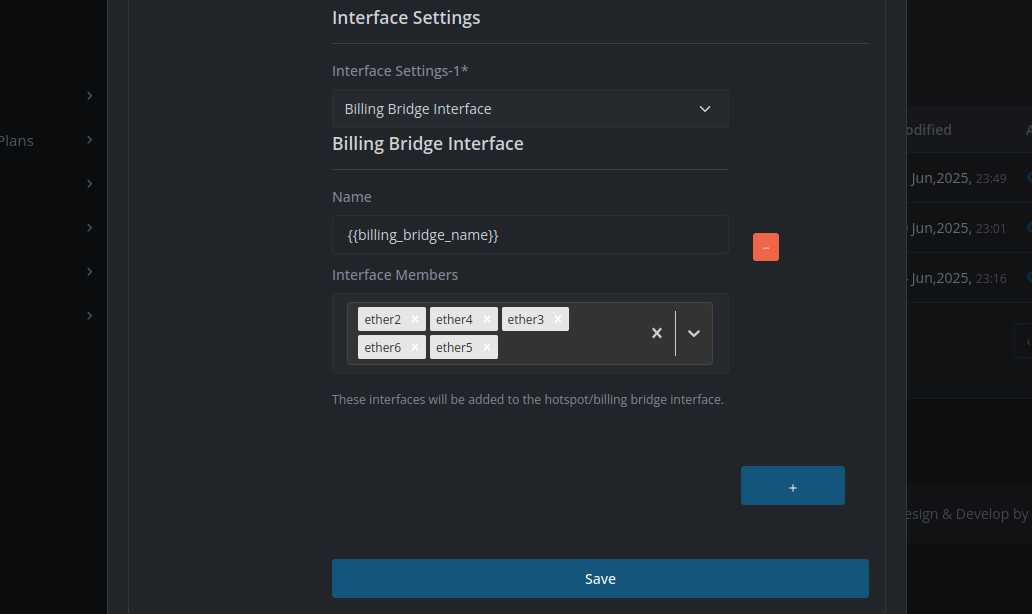
Below the device templates, you will find the "interface settings" section. In this section, you can specify the interfaces that will be added to the billing bridge. Devices connected to these interfaces will be required to be authorized through Noch Wired Hotspot to access the internet.
Note: Your MikroTik device should have the monitoring template to be applied to interfaces on your device saved and recorded. If your device has been registered recently, it might take a few minutes for your device interfaces to show up.
Step 2: Adding interfaces to the Noch Wired billing bridge (br-lan)
On this step, we will select the interfaces to be added to the "br-lan" bridge. Click on the add button in the interfaces section. This will add the setting required to add interfaces to the hotspot interface.
Add Hotspot ports to Noch Wired Billing Bridge
%20(1).png)
Click on interface members to choose the ports to add to the hotspot bridge. Do not add "openwispvpn" interface or the interfaces that is connecting your router to the internet.
%20(1).png)
After selecting the ports, click on the save button to save and apply the configuration to your device.
You can close the edit device pop-up. You can notice that the configuration status of your device will change from "applied" to "modified." Your MikroTik router will download the updated configuration and apply the new changes. It might take up to 5 minutes for the configuration to be applied.
An image showing the configuration being applied to your MikroTik device. When the process is successful, the status of your device will change to "OK," and the configuration status will be changed to "APPLIED."
Step 3: Testing the hotspot configuration
Connect another device, like your smartphone or computer, to any of the interfaces of your router. I am going to connect to the wifi hotspot on my Mikrotik router using my phone.
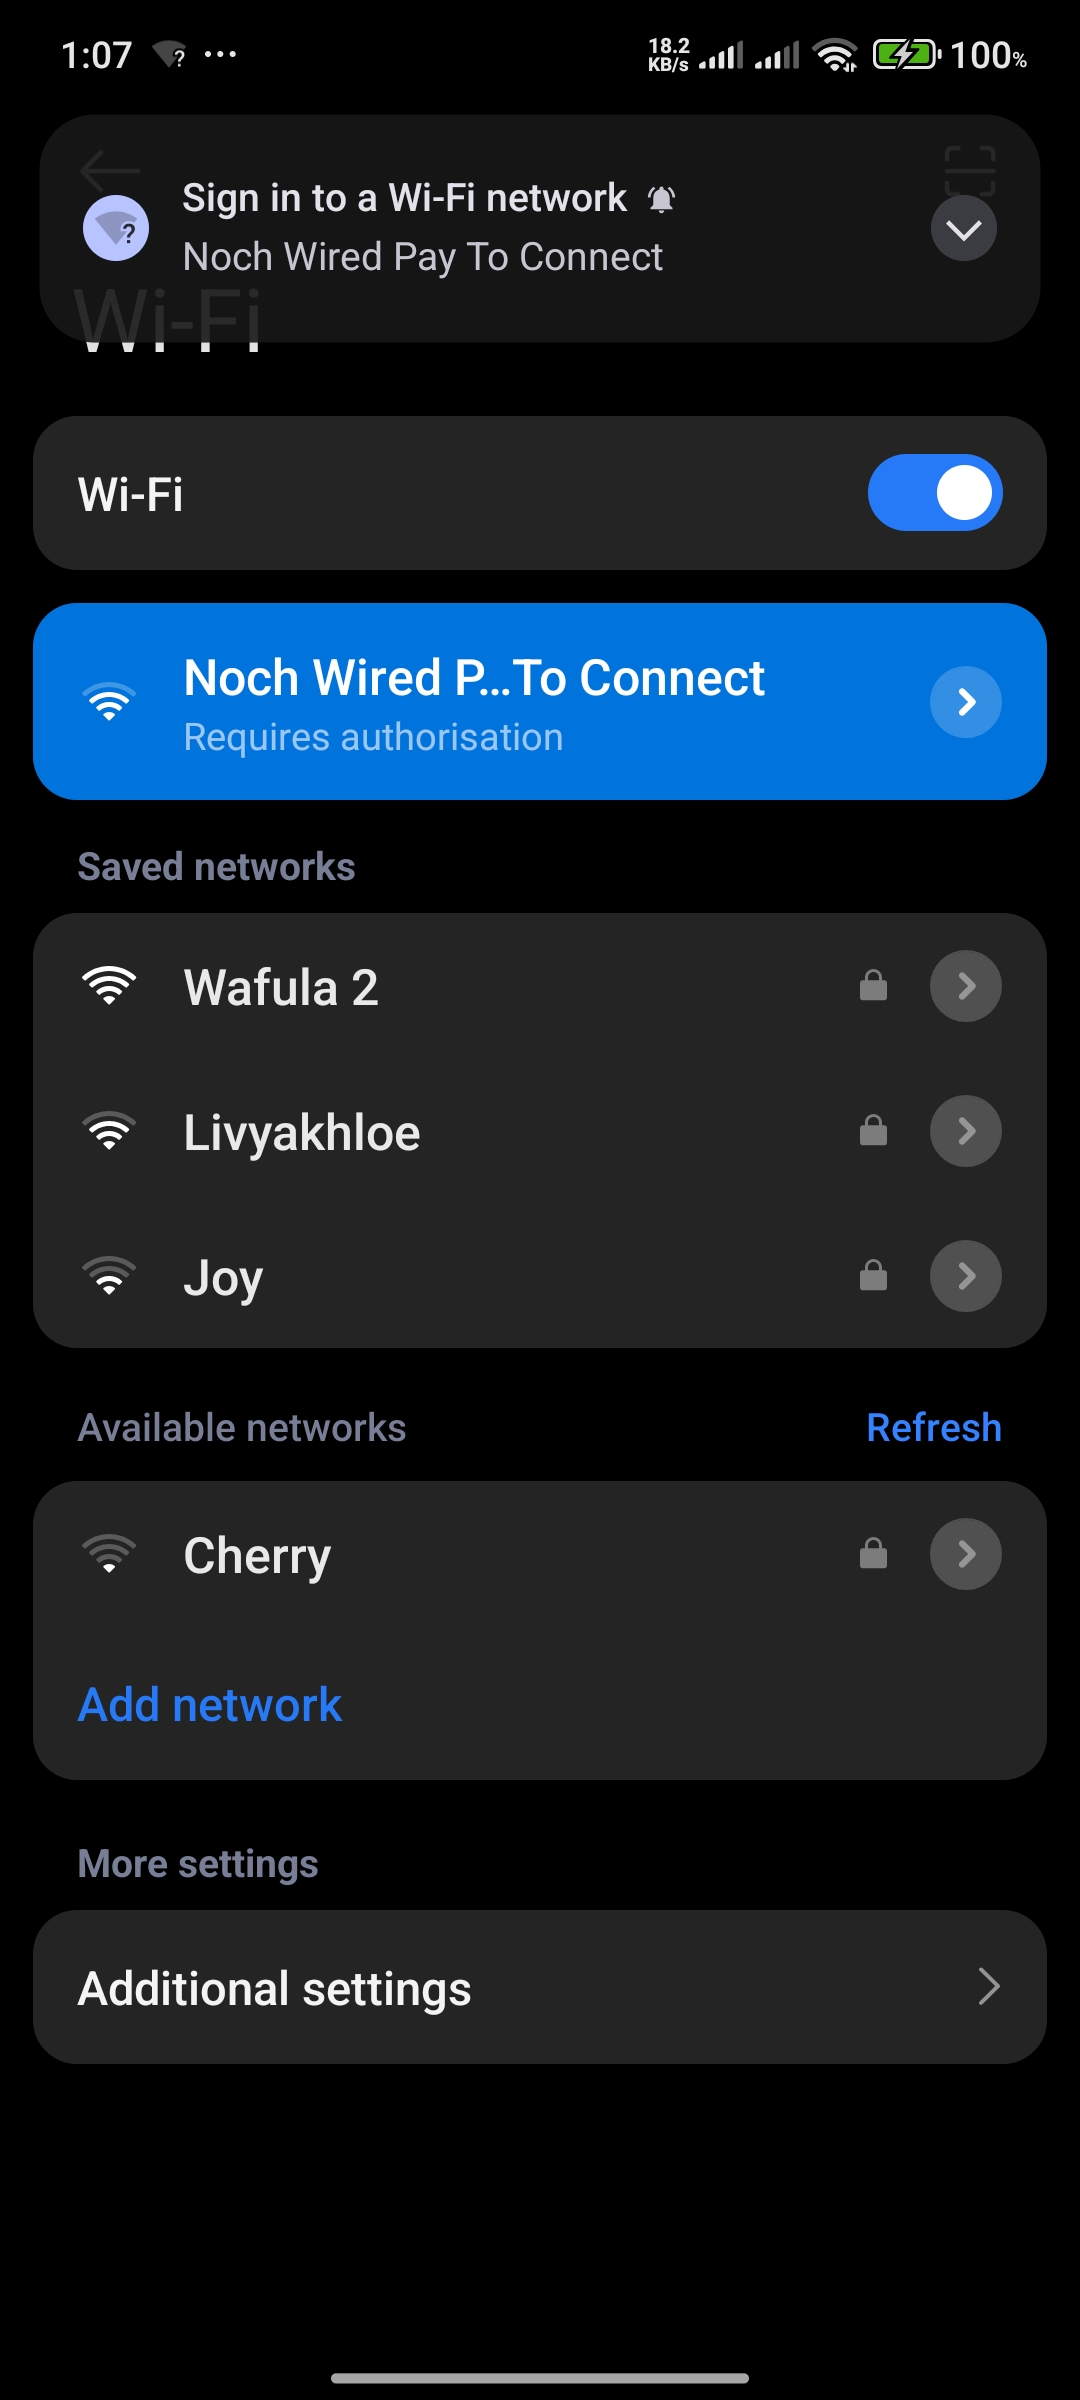
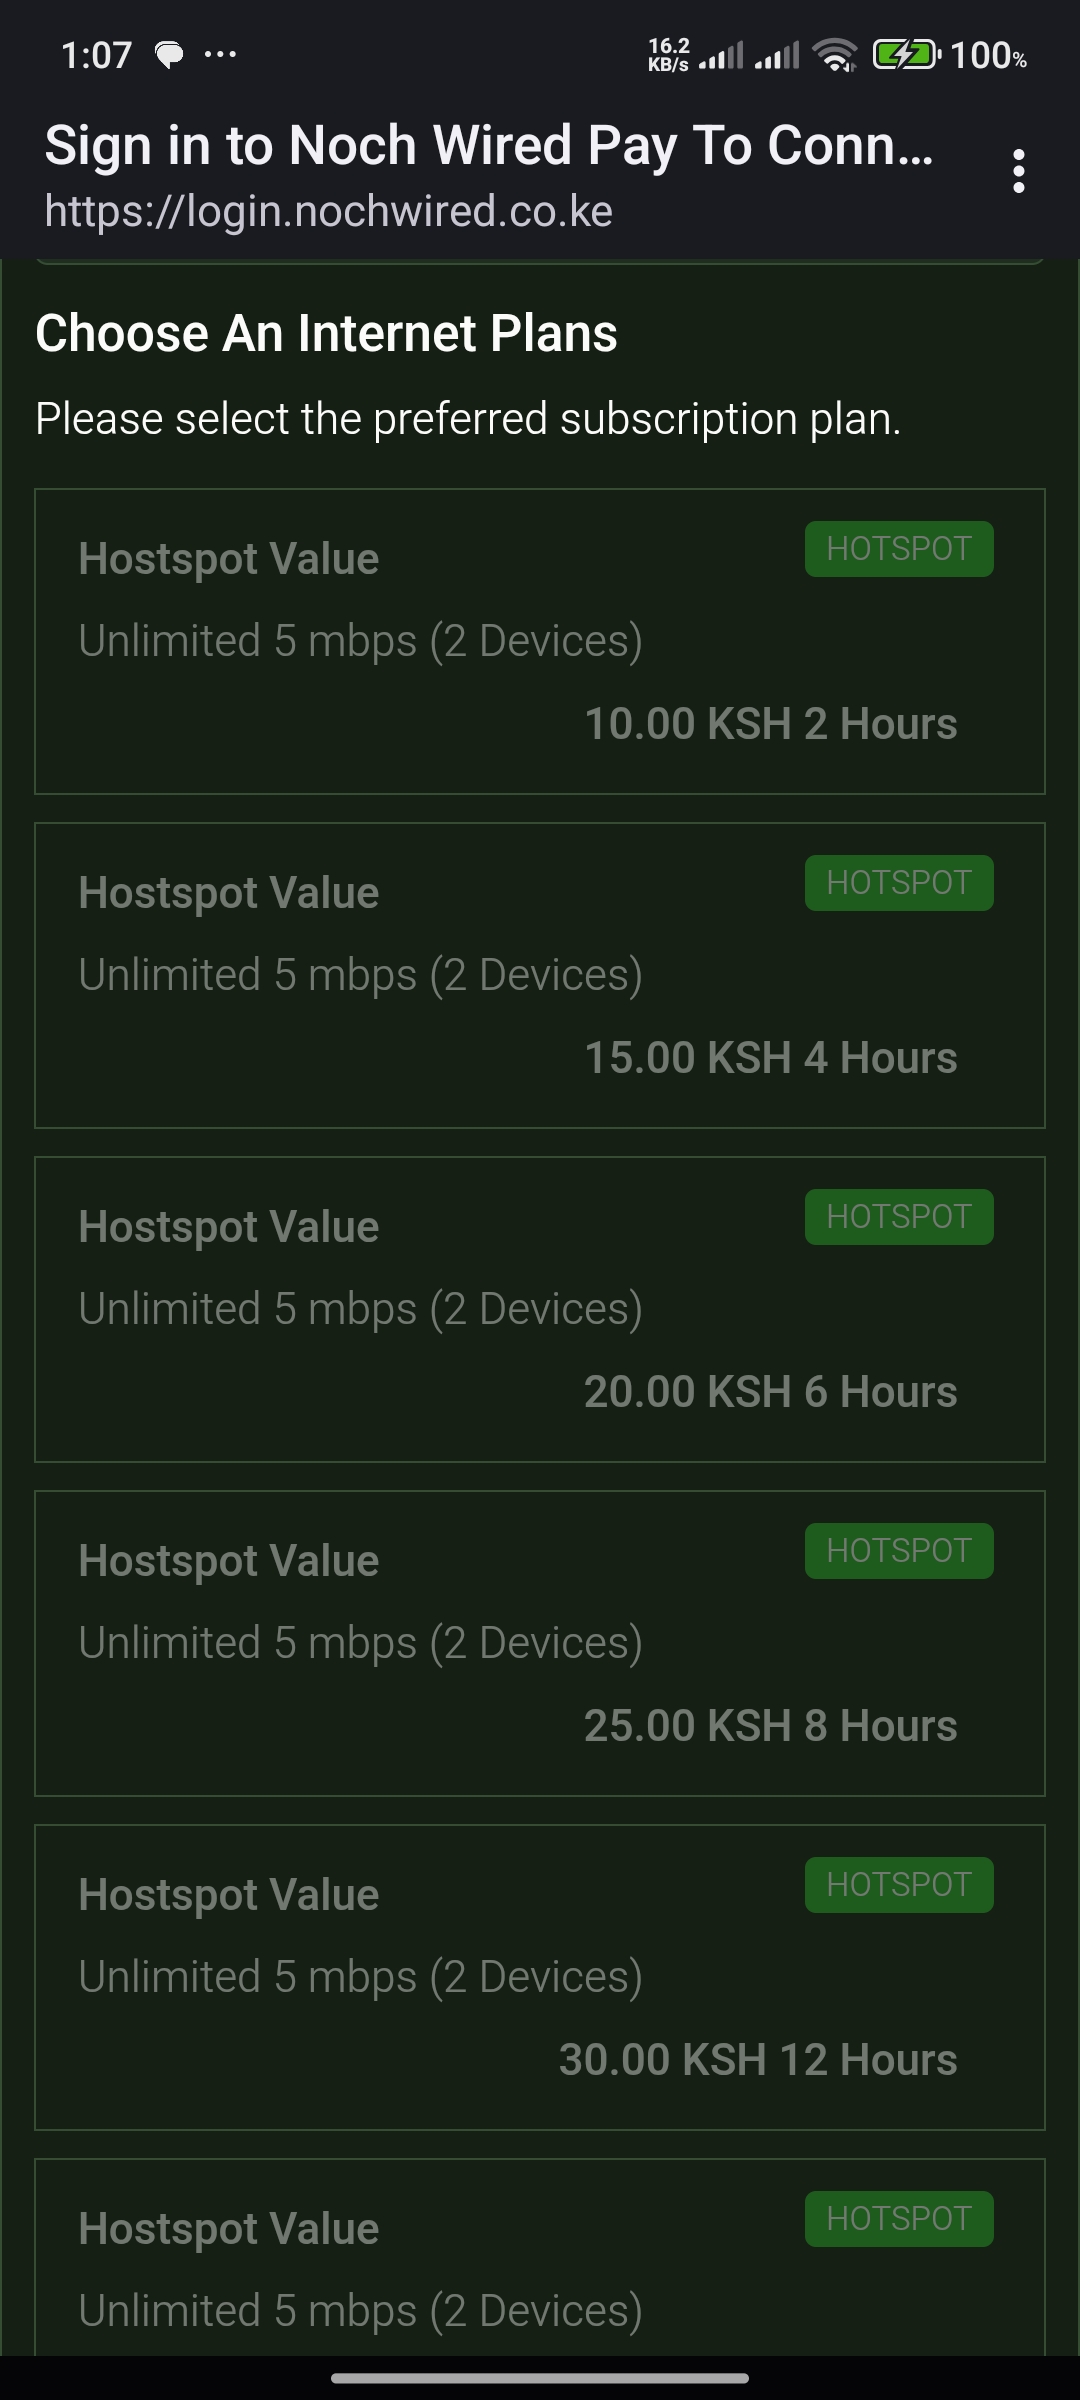
You will get a sign-in to wifi network notification on your device. On clicking on the wifi name, you will be redirected to "Noch Wired Wifi Pages" and asked to buy a new plan you have already configured plans for your organization.
Conclusion
In this article, we configured Noch Wired Wifi hotspot on a MikroTik router. On your registered MikroTik router, you need to edit the interface settings and add the ports your device is connected to (br-lan), which is the default interface that Noch Wired Hotspot is going to be applied to. If you add your Wi-Fi interface to this bridge, all the connected devices will be handled by Noch Wired Hotspot.
If you have any questions or need further assistance, feel free to reach out!
Additional Resources
Popular Posts